Sunday, February 15, 2009

Background notes about Frankie

For a while now, I've thought it would be fun to make some kind of stuffed or robotic parrot that I could wear on my shoulder as part of a costume, or just for fun, at events like Arisia.

One of the problems with perching a fake bird on your shoulder (as opposed to a fake cat or dragon or other long quadruped, which can drape over your shoulder and look natural) is that it won't balance the way a real bird will. If it isn't anchored properly, and stiffened in the right places, it will bob back and forth in a ridiculous manner. And I have simply too much dignity to put up with that.

Finally it dawned on me that if the feet/legs of the bird were firmly fastened to some kind of shoulder armour, that would provide a sturdy, rigid enough base that the bird wouldn't bobble around and look ridiculous. Plus, if I were making a cyborg kind of parrot, then having a cyborg kind of shoulder on me would look perfectly natural and not at all ridiculous (at Arisia of course, I'm not going to wear this to go buy lettuce).

While talking this over with a friend, one of us thought about the parrot issue and said, "Oh, pirate!" and the other thought about the cyborg issue and said, "Oh, Borg!" and then we both said, "BORG PIRATE!!!" Because after all, pirates are kind of like primitive Borg - replace the Borg arm prosthesis with a hook, and the Borg eye enhancement with an eyepatch, and leg prosthetics with a peg-leg, and there you go.

Not to mention they're both known for terrorizing other sea (or space) faring folk, boarding them, killing or enslaving their victims, and making off with all their neat toys.

So most of a year went by with me thinking I really ought to get going on this costume, because it would take a lot of time. And I really wasn't sure how to go about making the parrot.

And then, out of the blue, someone on the parrot_lovers community on Livejournal posted a link to this sun conure pattern at Silver Seams, which is free, and Open Source, and really quite excellent all round.

So I used that to build Frankie, only I made his primaries and tail out of silver paper instead of felt, and I augmented him with an LED eye (wiring and associated electronics done by a friend who had time and soldering experience that I did not), and made his feet out of aircraft cable (NOT recommended; that stuff is a real pain to work with - it doesn't want to bend the way -you- want it to bend) so that he could grip the cables and tubing on my assimilated shoulder.
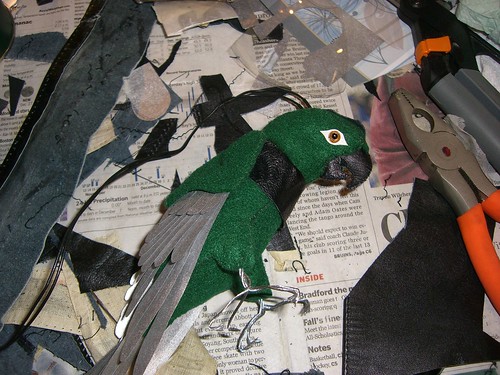


Frankie's avian side.
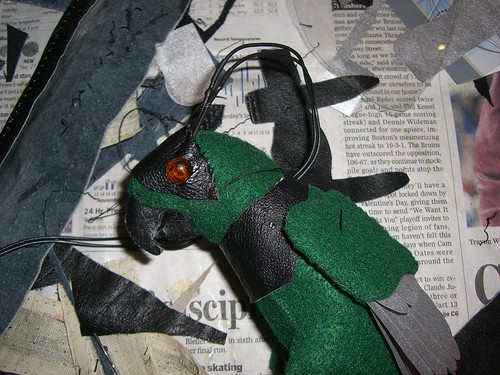


Frankie's assimilated side.

Original pattern copyright 2006 Silver Seams, Creative Commons Attribution-ShareAlike License 3.0

Unsatisfyingly short work session

I have a pile of wood to use for the automata kit. Some of it needs to be milled to the right thickness, but there were plenty of pieces that are nice rectangles that want to be the thickness of the wood I've got.

So I went down to the basement to use the kind of sketchy bandsaw and do that. And it went really fast.

Too fast.

I want to cut more wood up, but first I have to get to the shop where the planer and drum sander live, so that I can mill down the remaining wood. That can't happen until tomorrow evening at the earliest, and I want to do more stuff NOW.

Instead I will have to settle for uploading pictures of Frankie, the Borg parrot, to Flickr.

Like so: Borg parrot.

Monday, February 9, 2009

Automata resources

Way back in September, I jotted these down with the intent to store them somewhere more useful, because the instant I started seriously thinking about making wooden automata, I knew that I must make some. (And I am - finally! having finished some other, more time-sensitive projects - in the very early stages of doing so now, using the pattern in Peppe's Automata and Mechanical Toys.)

Books:
Rodney Peppe - Automata and Mechanical Toys - has lovely color photos of a variety of automata by different people, and plans and instructions for building a basic kit of mechanisms.

Frost's Whacky Toys aka Making Mad Toys

Raymond Levy - Making Mechanical Marvels in Wood.

A book on BEAMbots, which sound like robotics I could get into.

Other Resources
Automata resources at Dug North.

Dug North list of useful books

A nice page of mechanisms.

Saturday, February 7, 2009

Project: Completed conversion of zombie into mutant aquatic creature

Right. So. Way back in October, I finished the squid-eel known as Pork Chop.

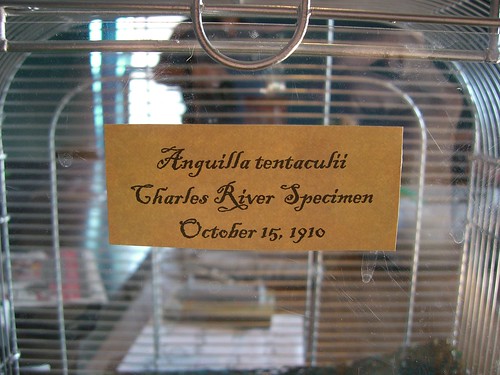
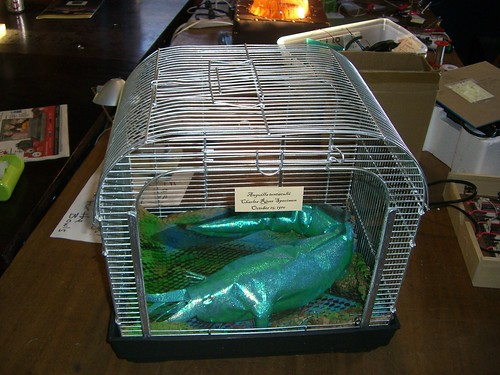
I used a pretty green pearlescent paper to cover the finished body, with some strips of thin, transparent, dark grey PVC used as a fin along the top and tail. The enclosure was a cheap bird (or small animal) cage I found at Goodwill, painted with silver and black paint. I slapped a label on the front to complete the look - I printed the text with an old-timey looking script, and used a marker to give the paper an aged look.


Pork Chop worked just fine - up until the first night of the Halloween show, at which point his eyes stopped lighting up. I still haven't debugged that, because in order to actually get at the interior, I'll have to remove (destructively) the paper exterior and then make a new one. Bad planning/design. Would be much better to have an exterior that could be removed non-destructively, but it turned out that the easiest way to quickly attach the paper to the denim underlayer was glue. Lots of glue. And since I didn't design/build the denim underlayer to be easy to remove, well, I have a problem. (Not much of a problem; I have plenty of the paper left, and can buy more.)

But moving on to the construction:


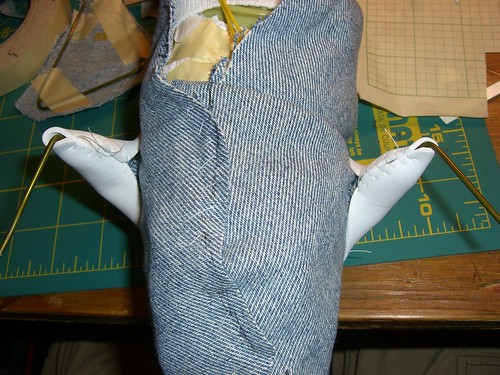
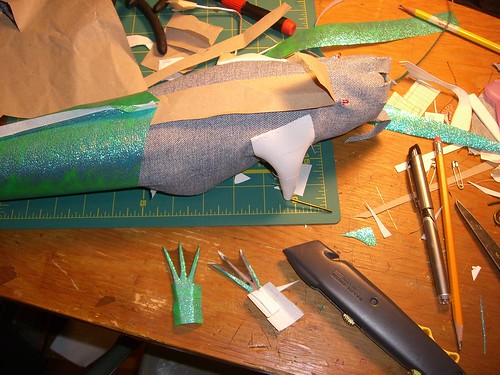
Leg in progress. I wrapped pieces of thin white foam ("Foamies" from Pearl Art) around the existing plastic structure, and stitched it to the denim underlayer, and to itself on the back side of the leg.


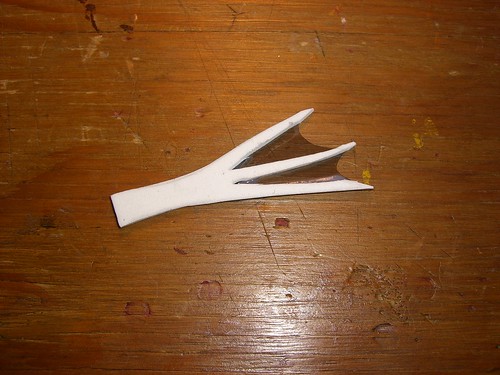
One little flipper foot. Thin white foam and PVC used for the webbing.


Beginning to cover Pork Chop with his pretty scaly paper skin. In the foreground are the flipper feet, with the foam covered with paper - the paper that isn't yet wrapped around the flipper will be used to attach it to the wire and to the foam making up the upper leg.


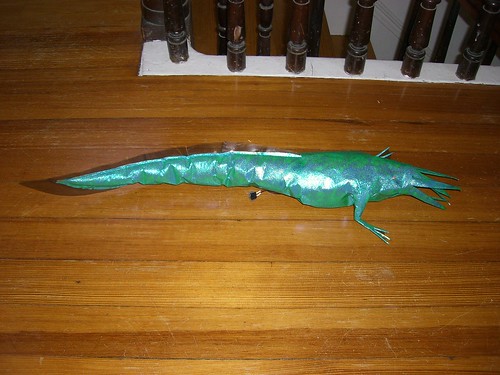
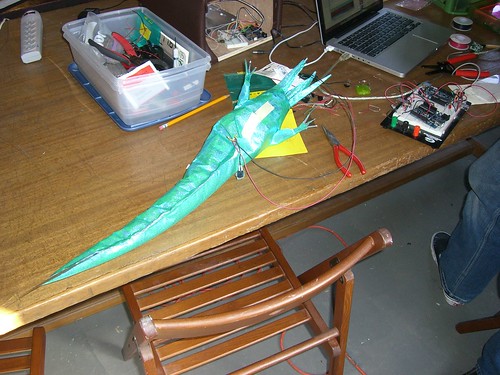
The finished beast. The fin along Pork Chop's back and tail is made from a thin PVC sheet. The original switch from the zombie is still sticking out under his belly - this will be wired in to an Arduino to set up the IR switch that will be used in the show.


I think I liked the floppy denim tentacles better than this rigid paper ones. Still, he managed to charm a couple barristas at the local coffee shop when I went in there, squid-eel tucked under my arm, to get some coffee to tide me over dealing with the serious electronics bit of business.


To line the cage, I took some packaging paper and spray-painted it with UV-reactive paint. Poor Pork Chop didn't fit very comfortably inside.


I had help with the electronics, because I know nothing whatsoever about programming Arduino things. See, we had this neat little handheld lights that had a UV tube and a regular LED. The LEDs were replaced with IR LEDs, and each exhibit in the show was set up with an IR-detecting LED. Waving the UV light over the exhibit was supposed to reveal the location of the IR-detecting LED; shining the IR light on the IR detector would turn on the exhibit.

Pork Chop had three ways to be activated: the pressure-activated switch from the zombie's hand, a light/motion sensor, and a sound sensor. Since I had already deactivated (or hidden) the latter two, the pressure switch was hooked up to an Arduino that was programmed and wired up to handle the IR-detection. We left the pressure switch intact for testing purposes and because, when the show was over, the Arduino was returned to its rightful owner.


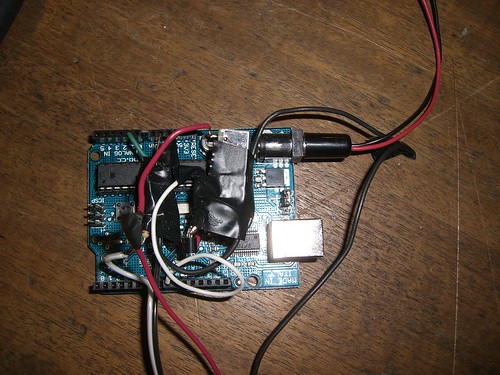
The brains of the operation.

There was only a tiny bit of programming needed, to tell the switch how long to wait before resetting. Also we had to tweak the threshold at which the IR detector would pick up additional IR - the setting for the actual show was a much dimmer place than the sunny room the electronics were built in.

So, that was the squid-eel.

It was a lot of fun - I wish I'd bought several more crawling zombies, so I could have made an entire menagerie of weird twitching creatures! Maybe next October . . .

Tuesday, October 21, 2008

Project: Turning a zombie into a mutant aquatic creature, Part 2, the creation of a new skin

I've had more ideas about how to proceed from the previous session than I can ever conceivably pull off, and what I ended up with wasn't actually on my list anywhere. It just sort of happened.

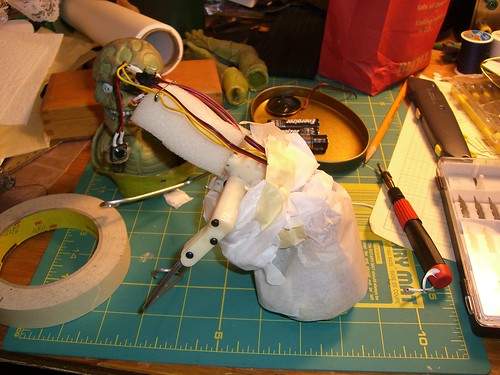
I started off by wrapping the body of the toy with some wadded up trace paper, to protect the wires and components, and to fill out the body so it didn't look weird when I put a new skin over it.


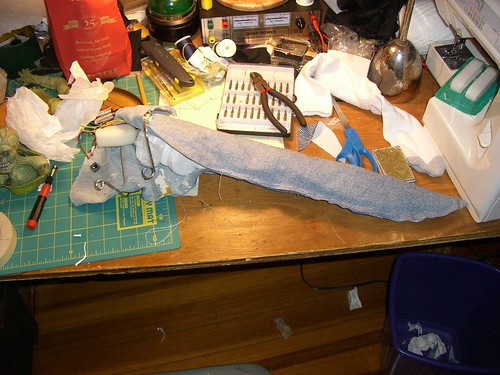
I have a bunch of cheap tube socks lying around, for use in other projects, and I used several socks stuffed inside another sock to start forming a long, fish-like body. The open end of the stuffed sock easily stretched over the base of the plastic toy. Then I cut some scrap denim (read: old jeans with a ripped seat and paint all over them) into a more-or-less eel-like shape, fit it over the sock, and started basting it together.


I left a gap in the belly so I can replace the batteries; this will need a better solution in the final model.

When I got to the head, I wrapped more trace paper over the existing wire and foam head, and then played around with how to wrap the denim around to make an appropriate fishy face.

I did not exactly end up with your typical fishy face.


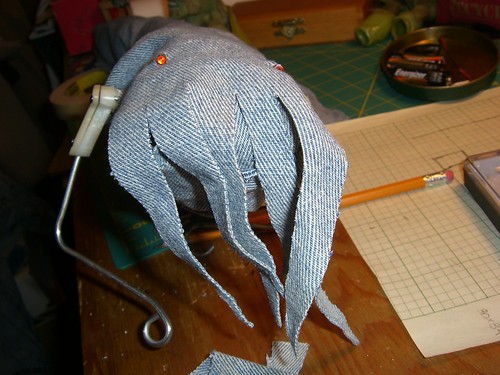
What happened was, as I was playing around with all the excess denim in the head area, some of it flopped forward into a long thin snout, which I kind of liked. And then I thought I could cut it into multiple strips, like tentacles. And then I tried forming a normal sort of fish head again. But the tentacle idea wouldn't leave me alone.

So, tentacles.

Really pretty cute, no?


I think I'll name him Pork Chop.

Next up is figuring out what the arms er flippers er tentacles er appendages are going to look like.


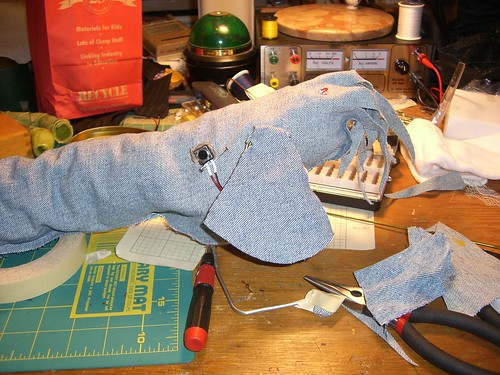
I like the fins; they go well with the overall fish-shape.

But I've also tested out some more arm-like appendages, and I think that's where I'm eventually going. They look a little better scrabbling against the floor than the fins do.

Speaking of scrabbling, poor Pork Chop can't really pull himself along the floor the way Dead Ed could. Too much weight, or drag, or something.

I am now in possession of materials for covering the squid-eel, including some lovely pearlescent paper (kind of plasticized paper), and thin foam for the tentacles.

I still need to replace the switch with one that is magnetically activated, and build/buy/trash-pick some sort of cage.

Saturday, October 18, 2008

Project: Turning a zombie into a mutant aquatic creature, Part 1, the skinning

So Willoughby & Baltic is going to put together an interactive Halloween show at the Charles River Museum of Industry.

It'll be in three parts, and the third part, the part that appeals the most to me, is a series of interactive "exhibits" of weird aquatic creatures that have been captured or created or something by a mad scientist, in approximately 1910.

I'd been thinking about getting some plastic creatures - fish, lobsters, reptiles - and hacking them apart and gluing them back together in ways Nature never intended, and then figuring out a way to animate them [It's ALIVE!!!].

And then I walked into the Walgreens near work, and found Ed.


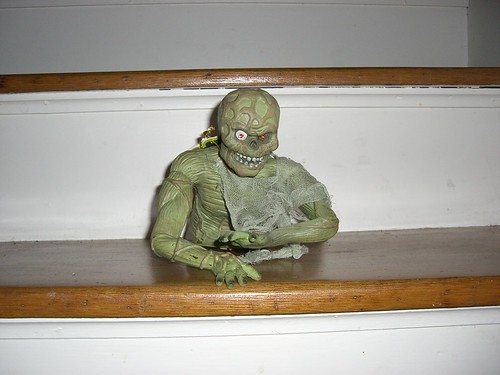
Dead Ed, the Crawling Zombie.

When the switch in his hand is pressed (or, if he's set to react to noise/motion, when the noise/motion sensors are tripped), his red LED eyes light up, he moans and groans and says things like "I can only crawl after ya so fast!," and his arms start moving at a frantic pace, gradually pulling his legless body across the floor.

You can see the potential.

It took me a day or two to decide I really wanted to acquire one of these, because none of them in the store actually worked, and while it might have been due to dead batteries, maybe it wasn't. Well, it wasn't.

I tried Dead Ed out on the kitchen floor, with Claude perched inside my collar. In retrospect, that might not have been the most brilliant move on my part, but Claude is rarely inclined to giving me harsh warning bites when something frightens him. Instead, he kind of puffed himself up and growled and muttered while Dead Ed skittered around the floor and groaned about not being able to feel his legs.

When I offered my finger to Claude, suggesting that he go hang out on the floor and take a closer look, he refused utterly.

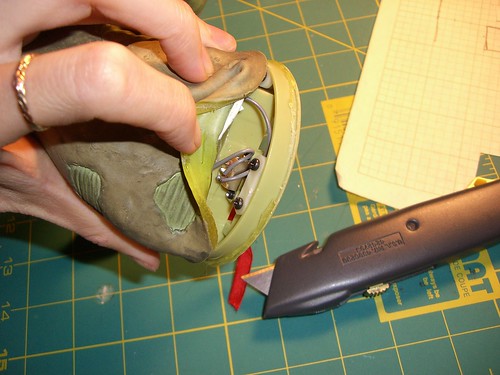
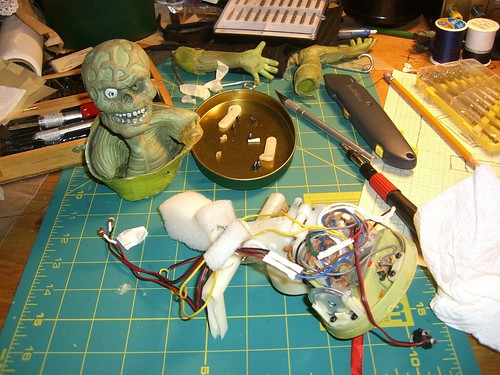
Later, after the birds were tucked into bed, I took Dead Ed up to my work space and got out a utility knife, to get to the business of figuring out what sort of mechanism and structure I really had to work with under that rubbery green skin.

I used a utility knife to cut around the base of the skin, thinking I could just roll it up over itself and remove it that way. During that process, I realized that the motion sensor was glued into the skin, so I had to cut around that, too.


It was fairly tricky to actually fold the skin back on itself, and I realized it would not be possible to pull it up over the shoulders. Unless I removed the arms, first.

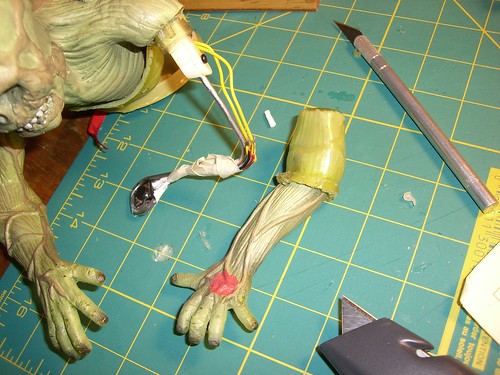
So I cut the arms off at the seam - well, I should I say I pulled them apart at the seam, as the glue holding them on was quite weak. It was fairly easy to pull the arm skin off of the armature, which was nothing more than some stiff wire, bent into an arm shape (oooh! And bendable into other configurations!).


The left arm contained the wiring for the switch; the right arm was just a piece of wire.

Not so scary-looking now, are you.

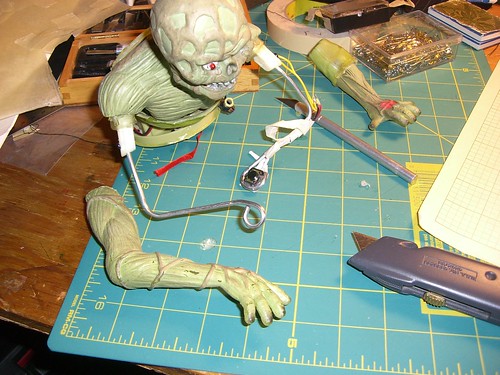
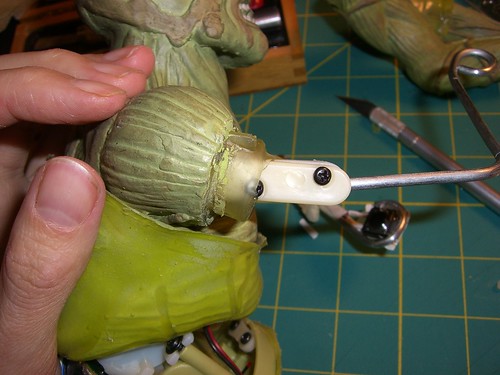
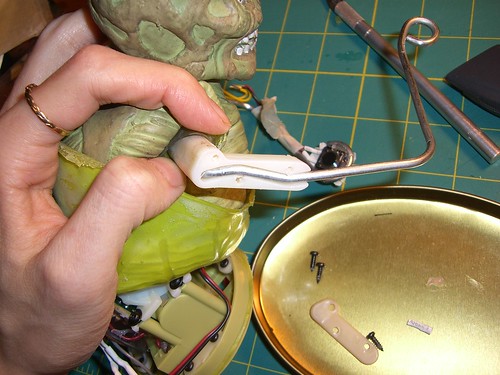
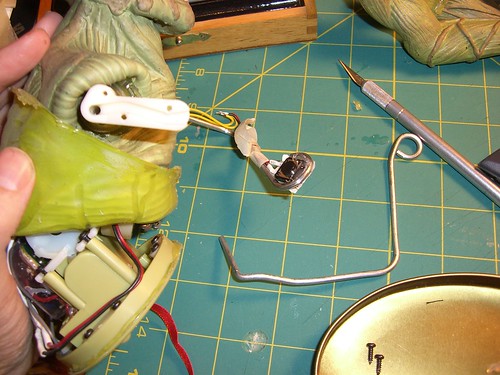
I still had to remove the arms, which turned out to be fairly simple. Each arm (the stiff wire) was held in place by a piece of plastic that was screwed into the shoulder. Once the plastic cover was removed, the arm could be pulled free.


Note use of lid of sewing box to keep small screws and things from rolling away.


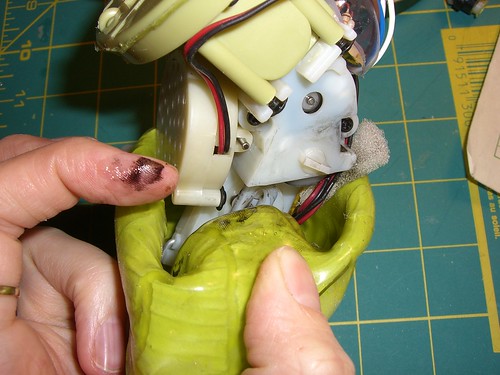
Once the arms were removed, the skin of the body was much easier to remove. It was also greasier inside than I expected.


Mmm, zombie grease.

It turns out that Ed's head was just a small block of foam with some wire inside it.

That's right, there were no brains.


The last step was to remove the LED eyes. They were glued in place, but some firm pressure was all that I needed to pop them out, and then the entire structure and mechanism was free of the skin.


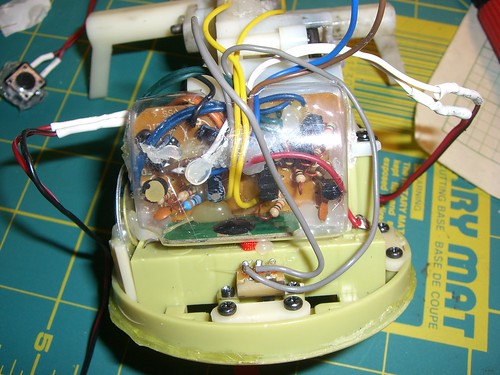
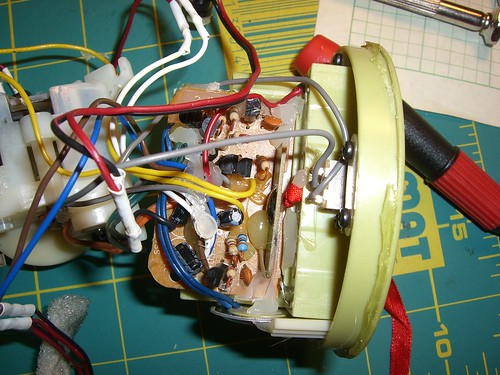
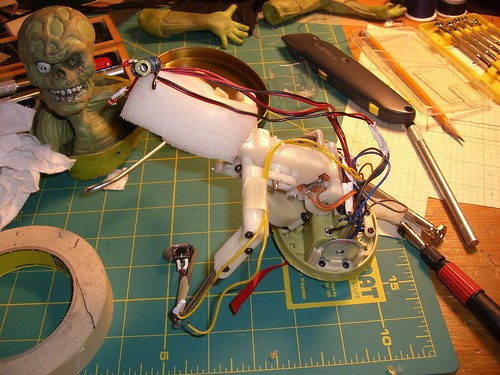
There are a lot of wires and electronic bits, protected by a thin plastic shell.


The wires are easier to see without the cover. I need to remember to replace that before I put the new skin on. Whatever that is. I haven't quite figured it out yet.


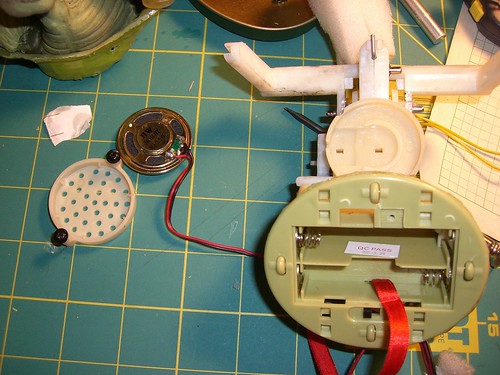
The speaker I will be disabling. Probably by careful use of a pair of diagonal pliers to the wires.


Tired of taking things apart (well, fearful, really, that any further disassembly would lead me to a state from which I could not return), I reassembled Ed, leaving the skin off.


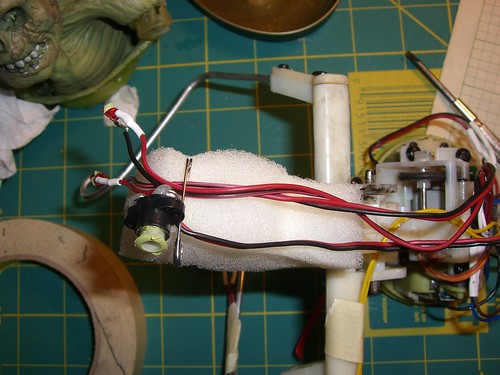
I used a safety pin to hold the LEDs and the motion/light sensor safely on top of the head.


And here he is, in action, Dead Ed the Skinless Crawling Zombie.


What's next? Well, I need to cut the speaker wires and create a new skin for this beastie. I have some stretchy snake-print fabric, and lots of random scraps of other potentially useful stuff.

I may also take a trip to the nearest cheap toy store and find something appropriate to cut up and attach to the existing armature.

Thursday, October 2, 2008

What's been keeping me busy

Work has been fairly busy, but mostly it's been this.

Well, not the website, the spaces that the website talks about.

I've been helping get the spaces ready for use; painting and cleaning and moving furniture and lots of meetings. So there have gone many of my evenings and weekends for the last 2-3 weeks.

But tonight we're having an Open Hack session, and tomorrow (because it is the first Friday of the month) is an Open House, which hopefully will have some non-members at it who will love it and become members.

We still have a lot of work to do, especially in the large fabrication space, and there are various smaller tasks left in the Hackerspace and the Model Shop, but those two spaces are ready for use, now that they are all cleaned and painted and organized.

I'm really excited. Not so much about the Hackerspace (though it looks GREAT), because my knowledge of electronics is next to nothing, but the Model Shop. (And when it is ready, the Fab shop.) I've missed the shop I had access to at school, and while this isn't quite as well equipped - yet! - it is pretty close, plus there are tools we did NOT have at school, which I am especially keen to learn about and start using.

Tuesday, September 9, 2008

Headphone fixes; jacket to vest conversion

I have a completed project that I should post; I have lots of pictures, even!

It was a pair of headphones, with the foam ear covers completely disintegrating. I replaced the foam with fleece fabric, so they are once again wearable.

The other project is still in process, and I am not documenting it well, but I should do some of that. It was a nice fitting jacket I found at Dollar a Pound, pin-striped, with some unfortunate white stains (nail polish? paint?) on the collar and upper back, not suitable to be worn anywhere nice without removing or covering them up.

At any rate, I was looking for a vest or for a jacket I could turn into a vest. If not for the stains, I don't know if I could have actually started to disassemble it, because it fit so well.

Well, it no longer has its sleeves, and I cut down the sides to make the arm openings a better fit for a vest. I'm going to deal with the stain on the upper back by making sewing black leather over the shoulders and upper back, and deal with the stain on the collar by putting some white lace over it. Should be an interesting combination.

Also, I screwed up the arm holes - cut them too big, they looked awful. So I am now sewing fabric back on. Argh. But it occurred to me that I could make this less obvious by adding pockets. Yes, to the sides of the garment. Why not? People have small under-arm bags and things, why not pockets.

(Also found at Dollar a Pound: a leather boys' jacket and a brocade handbag with a neat mechanical hinge closure; I want the leather for my next Arisia costume. The body of the jacket fits me well, but the sleeves are way too short. It was a nicely lined jacket, with a second zip-in liner in addition to the sewn-in quilted liner. I am saving the linings for a potential future project. The bag I couldn't resist because 1) mechanical closure! and 2) Dollar a Pound. Also, I need more projects.)

Tuesday, August 26, 2008

The aesthetics of disassembly

Via Boing Boing, a set of really lovely photographs of disassembled household appliances.

While I often find the innards of objects quite lovely, I rarely manage to capture that in photos. I try to remember to photograph the things I take apart, at every step and from all angles, both to document the process and because, if I decide I -do- want to put it back together, I will not have to rely on my memory alone to remind whether this tiny ^%$#^&%$^ screw goes in -this- hole or -that- one. Especially when it's been months since I last handled it. If I get pretty pictures, I consider that a bonus.

Monday, August 25, 2008

Picture hangers - not so easy, actually

There's a pile of unusable fluorescent light fixtures in the basement; their ballasts are dead, so they are good for nothing except scrap metal.

I thought they would be an excellent source of metal for making picture hangers, of the kind which could fit over a bookshelf, so that you can hang pictures in front of little-used books in rooms where there is NO EMPTY WALL SPACE WHATSOEVER on account of being lined entirely with bookshelves. What I want is a strip of metal about 16" long or so, which I can bend into a square hook at one end (which will fit around the back of the shelf and keep the hanger in place) and fold into a hook shape at the other end.

I've been plotting this for several months, but despite it being a pretty easy-sounding project, I hadn't actually done much more than sketch up some diagrams. Until this weekend.

I made a stab at cutting strips of metal off of the discard fluorescent fixtures with which to make over-the-shelf picture hangers.

And rediscovered that cutting lengthy strips of metal off of a larger piece is not as easy as cutting strips of cloth or paper or even chipboard, because the larger piece is - shockingly - just not so flexible! And so it gets in the way as you make progress with the shears/snips. Especially when you did not start with a flat piece, but with a piece already folded in several places to make a sort of boxy shape.

I did not succeed in getting anywhere near the 16 or so inches I need.

Conclusion: need access to appropriate power tool OR should break down and buy appropriate strips of metal already cut.

Am hoping that the impending community workspace will have such tools, because buying the material pre-cut seems like cheating, and then what I would do with this pile of ex-fixtures?? There's plenty of good metal in them, after all, it would be a shame to throw them out.

Meta: guilt at having not worked on any projects and thus not updated blog forced me down to basement to hack at metal unsuccessfully. Also to buy more rubbing alcohol to finish cleaning tool chest. Blog may not be such a bad idea after all.